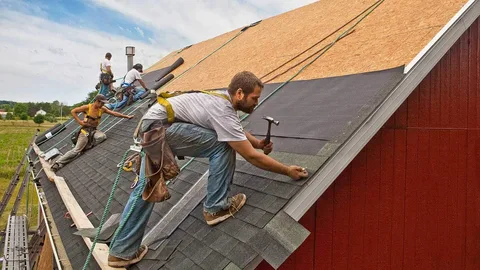
Roofing can be dangerous. If you’re uncomfortable with heights or the complexity of the work, it’s best to hire a professional Roofing Repair Services. The first line of defense against the weather is your roof. It protects your home from rain, snow, wind, and harmful UV rays. When it sustains damage, it’s crucial to address the issue promptly to prevent further damage and potential leaks. While complex repairs often require professional expertise, there are some minor roof repairs you can tackle yourself.
Assessing the Damage Roofing Repair Services
Before you start any repairs, it’s essential to assess the extent of the damage. Climb up to your roof (safely, with proper equipment) and inspect it thoroughly. Look for:
- Missing or damaged shingles: These are often caused by strong winds or hail.
- Cracked or curled shingles: These can lead to leaks and should be replaced.
- Leaks: Examine your walls and ceilings for water stains.
- Flashing issues: Look for damaged or loose flashing around chimneys, vents, and skylights.
If the damage is extensive, involving multiple areas or structural issues, it’s best to call a professional roofer.
Necessary Tools and Materials
- Safety equipment: ladder, safety harness, gloves, and sturdy footwear.
- Roofing nails
- Roofing cement
- Replacement shingles (if needed)
- Utility knife
- Pry bar
- Hammer
- Caulk gun
Common Roof Repairs
Replacing Damaged Shingles
- Safety first: Ensure you’re securely on the ladder and wearing safety equipment.
- Remove damaged shingles: Use a pry bar to carefully remove the damaged shingles and any underlying nails.
- Install new shingles: Slide the new shingle into place, aligning it with the surrounding shingles.
- Secure with nails: Nail the shingle in place, using roofing nails and a hammer.
- Seal the edges: Apply roofing cement to the edges of the new shingle for added protection.
Repairing Flashing
- Access the damaged area: Carefully climb to the area where the flashing is damaged.
- Remove damaged flashing: Use a pry bar to remove the old, damaged flashing.
- Install new flashing: Cut a new piece of flashing to the correct size and shape.
- Secure the flashing: Nail the new flashing in place and seal the edges with roofing cement.
Sealing Leaks
- Locate the leak: Determine the exact source of the leak.
- Clean the area: Remove any debris or loose materials from the leaking area.
- Apply roofing cement: Apply a generous amount of roofing cement to the leaking area, covering all cracks and gaps.
- Reinforcement (optional): For larger leaks, consider using a roofing patch or flashing for added strength.
Tips for Roof Maintenance
- Regular inspections: Check your roof at least twice a year for signs of damage.
- Clean gutters: Remove debris from gutters to prevent water buildup and ice dams.
- Trim tree branches: Overhanging branches can damage your roof during storms.
- Professional maintenance: Consider hiring a professional roofer for regular inspections and maintenance.
Remember, roofing is a physically demanding and potentially dangerous task. If you’re unsure about any part of the repair process, it’s always best to consult a professional roofer.
Conclusion
Tru Roofing repairs can be a rewarding DIY project, saving you money and giving you a sense of accomplishment. However, it’s essential to prioritize safety and recognize the limitations of your skills. For extensive damage, complex repairs, or if you’re uncomfortable working at heights, it’s crucial to enlist the expertise of a professional roofer.
FAQs
How much does a roof repair typically cost?
The cost of a roof repair varies greatly depending on the extent of the damage, the type of roof, and labor costs in your area. Small repairs like replacing a few shingles might be relatively inexpensive, while extensive damage or complex repairs can be more costly. It’s always a good idea to get multiple quotes from different roofing contractors to compare prices and services.
How long does a roof repair usually take?
The duration of a roof repair depends on the complexity of the job. Minor repairs like replacing a few shingles can be completed in a few hours, while more extensive damage may take several days. Factors such as weather conditions can also impact the timeline.


