“I’m switching to Office 365 from Outlook on the Mac due to the nice features for teamwork and perfect operation. I need help migrating my calendar, contacts, and emails from Outlook for Mac to Office 365 without any problems. I don’t have a single minute to stop working. Please provide simple step-by-step instructions for Transfer Mac OLM files into Office 365. Your experience will definitely be quite helpful in ensuring everything goes well.”.
This blog is for you if you’re among those who wish to handle the importing procedure. We’ll go over a few methods in this article for importing your Outlook OLM file for Mac into O365. For improved performance, users can also make use of the OLM Converter. Before we get into the important methods, let’s talk more about a few typical causes.
Reasons to Import OLM File in Office 365
In the next section, we’ll talk about the requirement to import OLM to Office 365.
- Compatibility Issue: OLM files can only be accessed through Outlook for Mac; hence, you might see your mailbox data, such as emails, contacts, calendars, etc., only on a Mac with Outlook. But if you move it to Office 365, you can access and manage your OLM file from anywhere.
- Access Data from Anywhere: The data stored in an OLM file is viewable only on a Mac running Outlook. But with Office 365, you can access your mailbox from anywhere and on any device.
- Zero Possibility of Data Loss: If you are using it on your computer or hard drive for a prolonged period, then you are risking data corruption. But you can store your data online in Office 365 and can use it without fear of loss.
Now, let’s consider a few reasons for the migration from OLM to Office 365 for emails. Now, let’s see how to perform this migration quickly with many methods.
How to Transfer Mac OLM files into Office 365?
Now, we will perform it in two ways. One will be native, and another will make use of reliable software.
-
Manually Import OLM file into Office 365
Configure Office 365 using Outlook for Mac in the first place.
- Initiate the Outlook application.
- After that, you need to enter your Office 365 password and email address.
- Then, select Add Account.
- Furthermore, click the Done button.
Manual Method to add an OLM file in Office 365: The Steps are as follows:
- Open the Outlook for Mac application on your system.
- In the menu bar, select the ‘File’ tab. All the options will appear.
- Click the ‘Import’ option from the dropdown select.
- Now, choose the OLM file you want to import.
- In the Import box, click “Outlook for Mac archive file (.olm)”.
- Click “Continue” to locate the location of your OLM file.
- Now select your OLM file and click “Import”.
Through these steps you can add an OLM file in Outlook for Mac. However, this method has some limitations.
Disadvantages of the Manual Method
- This process is lengthy, especially if your OLM file is large.
- The user must have the technical knowledge and proper understanding of the process of importation.
- There can be a case of loss or damage of data when importing data manually.
- The imported data is only accessed from the OLM files stored on your computer.
Avoid such issues by using a professional solution instead of using manual technique.
-
Automated Way to Import OLM to Office 365
You can safely and reliably import OLM files to Office 365 with the help of Softaken OLM to IMAP Migration Software. You can move one or more OLM files into your Office 365 inbox, public folder, or archive folder without any deletion of data. Using this software is so easy. The steps will be discussed in the section below.
How to Bulk Import OLM Into Office 365
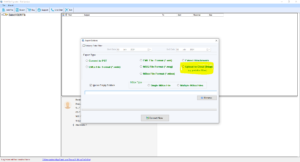
- Download the Tool and Launch it on desktop.
- Then, click Next after adding the OLM files you want to convert.
- Click on Show Preview to view the sample of data in OLM files.
- Then select Cloud from the list and sign in with your login credentials.

- Finally, click on the Convert button at the end to start the conversion.
Conclusion
You can import an OLM file in Office 365 with the steps mentioned below. First, set up Outlook for Mac and Office 365, then upload your OLM file, monitor the import process, and verify your data. At the other end, you will find easy ways to import OLM into Office 365 without loss of any important data.


